Artwork & File Guidelines for Sign Printing
Prepare print-ready files for professional signage — or let us handle the design for you.
What Makes a File Print-Ready for Signs
A print-ready sign file is vector artwork (or high-resolution raster) set up in CMYK color mode, with fonts converted to outlines, proper bleed, and resolution matched to viewing distance. Getting these right before submission saves revision rounds and protects the final print quality.
This guide walks through each requirement in order. Wide-format inkjet printing transfers your file directly to vinyl, banner material, rigid substrates, or wrap film with no plates or setup fees — which makes short runs affordable, but also means every flaw in the source file shows up at full size on the finished sign.
Don't Have Print-Ready Artwork?
Most customers start with just an idea, a rough sketch, or a description — that's perfectly fine. We ask the right questions to understand your vision and build artwork that works at signage scale.
In-House Design
- ✓ Full design from scratch
- ✓ Logo vectorization
- ✓ Layout adaptation across sizes
- ✓ Vehicle wrap and banner layouts
Larger projects: Design often included free, up to 3 revisions
Smaller projects: $30/hour for design work
Not Sure What You Need?
Every project is different. Whether you're producing a single banner, wrapping a fleet, or installing a full storefront package, we'll walk you through the artwork decisions that matter.
Contact us with what you have — even a phone photo of a hand sketch — and we'll tell you what's usable and what needs to be rebuilt.
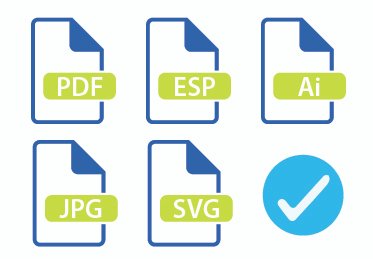
Choosing the Right File Format
Vector formats (.AI, .EPS) are preferred for logos, text, and graphics — they use math instead of pixels, scaling from a business card to a building wrap with zero quality loss.
PDF/X-4 is excellent for layouts combining vector and raster elements. We also accept packaged InDesign files, .PSD, high-res JPEG, PNG, and TIFF.
Why Vector Files Are Preferred
Signs can be 10 feet wide or more. A file that looks sharp on your phone will appear blurry when enlarged for print. Vector files (.AI, .EPS, .SVG) are resolution-independent and solve this entirely.
If you only have raster files (JPG, PNG), send the highest-resolution version available. We can work with high-res raster but can't add quality that isn't there.
Format Comparison
Converting Text to Outlines
Fonts on your computer are instructions your system interprets live. Transfer the file to another machine and missing fonts trigger substitution — often with disastrous results.
Converting text to outlines transforms each character into a vector shape — anchor points and curves that any system renders identically. Also called "converting to paths" or "converting to curves."
Typography Best Practices
- ●Save first: Keep an editable version before outlining. Once converted, text can't be edited.
- ●Minimum size: 6pt for close-viewing materials like business cards.
- ●Distance formula: 1 inch letter height per 10 feet viewing distance. 100 ft = 10-inch characters.
- ●Typeface: Sans-serif (Helvetica, Futura, Gotham) outperforms serifs in large format — clearer at distance.

Vector vs. Raster Graphics
Understanding these two graphic types prevents countless production headaches.
Vector Graphics PREFERRED
Stored as mathematical equations — points, lines, and curves recalculated at any size.
- ✓ Infinite scalability
- ✓ Tiny file sizes
- ✓ Fully editable
- ✓ Razor-sharp at any size
- ○ Can't represent photos
- ○ Complex art increases processing
Raster Graphics
A grid of pixels measured in PPI (pixels per inch) for digital files or DPI (dots per inch) for print output — total pixel count determines resolution and maximum print size.
- ✓ Photographic complexity
- ✓ Pixel-level editing
- ✓ Complex color gradations
- ✓ Universal compatibility
- ○ Enlargement causes pixelation
- ○ Large files at high res
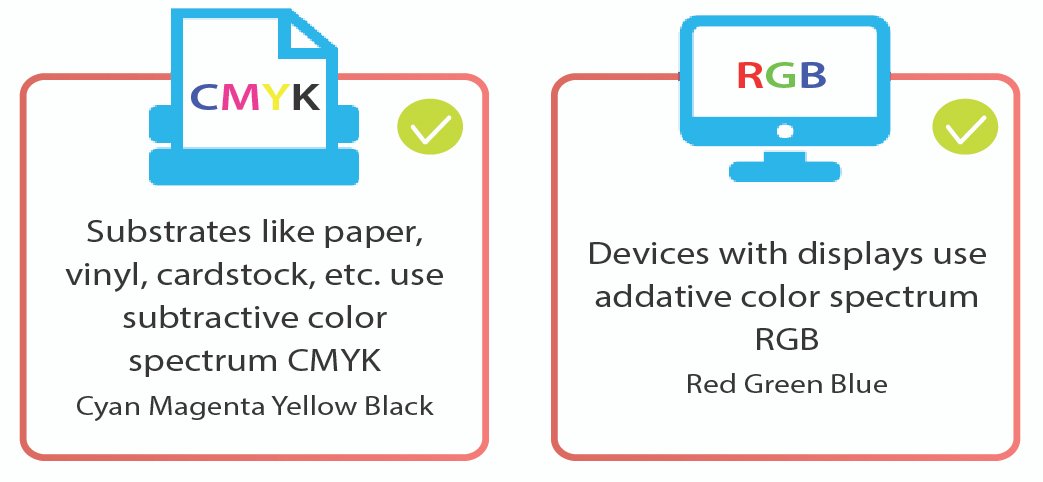
Color Models for Printing
CMYK (Cyan, Magenta, Yellow, Key/Black) is the backbone of commercial printing — inks combine through subtractive mixing, absorbing wavelengths and reflecting others.
RGB (Red, Green, Blue) drives screens through additive mixing. Its color gamut exceeds CMYK, so vivid blues, greens, and neons visible on monitors often fall outside the printable range and shift when converted for print.
Color Terminology
- CMYK
- Process colors for print. "K" = Key (black).
- RGB
- Additive model for screens. Must convert to CMYK for print.
- PMS (Pantone)
- Premixed spot inks for exact color matching across vendors.
- ICC Profile
- Device-specific data for accurate color interpretation.
Color Management Guidelines
- →Total ink: Keep combined CMYK under 300% to avoid drying issues and smearing.
- →Rich black: C:30 M:30 Y:30 K:100 for deep black. Pure K:100 looks washed out.
- →Color shift: Budget 10–15% variance screen-to-print. Request proofs for critical work.
- →Substrate: White maximizes vibrancy. Clear or colored materials need a white underbase.
Bleed Specifications
Cutting machines can't trim perfectly. Without bleed, minor shifting leaves white edges on the finished piece. Any element reaching the document edge must extend beyond the trim line into the bleed zone.
Key Terms
- Bleed Area
- Extension beyond trim. 0.125″ (3mm) small format; 0.5–1″ large signage.
- Trim Line
- Intended final dimension. Cutting targets this line.
- Safe Zone
- Interior margin for critical content. 0.125–0.25″ inside trim.
- Slug Area
- Space outside bleed for printer marks. Removed in final trim.
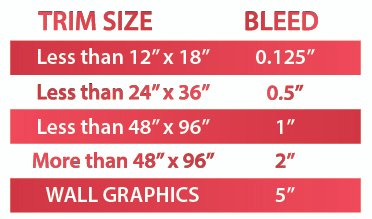
Image Resolution

Resolution depends on viewing distance. Human eyes can't distinguish pixels beyond certain distances, so matching resolution to context optimizes file size without sacrificing perceived quality.
Resolution by Viewing Distance
| Distance | Min DPI | Optimal | Applications |
|---|---|---|---|
| Under 2 ft | 300 | 450 | Labels, decals, small-format prints |
| 2–4 ft | 200 | 300 | Posters, trade show graphics, window vinyl |
| 4–8 ft | 100 | 150 | Banners, wall graphics, vehicle wraps |
| 8+ ft | 50 | 100 | Building wraps, monument signs, pylon signs |
⚠ About AI-Generated Images
AI generators (Midjourney, DALL-E, ChatGPT) output around 1024×1024 pixels — far too small for signage:
- • A 4-foot sign at 150 DPI needs roughly 7,200 pixels wide
- • A 1024px AI image prints at only about 7 inches at 150 DPI
- • Enlarging causes severe pixelation and blur
We can recreate AI concepts as proper print-ready artwork.
Note: DPI specs refer to final output size. A 300 DPI image at 4×6″ becomes 150 DPI at 8×12″. Always calculate at intended print dimensions.
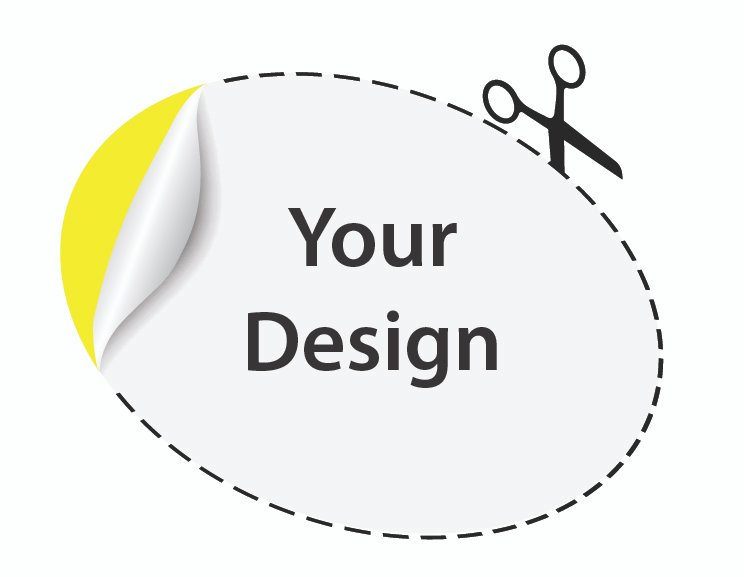
Shape-Cut Signs & Contour Cutting
Shape-cut production creates custom silhouettes, die-cut decals, channel letter faces, and contour displays. Your cut path must be a clean vector on its own layer, in a distinct color separated from print artwork.
Cut File Requirements
- 01Spot color: Name it "CutContour" or "DieLine" — production software recognizes these.
- 02Stroke: 0.25pt or hairline. Thick strokes create ambiguity.
- 03Closed paths: Every cut path must be a complete closed shape.
- 04Registration marks: Required for multi-layer applications.
- 05Safety margin: Min 0.125″ (3mm) between artwork and cut lines.
For vinyl decals needing weeding, include a color-coded reference showing which areas to remove versus preserve. For dimensional HDU or foam letters routed on our CNC, cut paths also drive the toolpath — clean vectors directly affect the finished edge quality.
How to Submit Your Files
Once your artwork is ready, send files through our upload portal (for anything over 25MB) or email for smaller files.
? File Upload Portal
Secure upload up to 2GB. Best for large artwork and multiple files.
Upload Files →Files under 25MB. Great for quick questions or simple projects.
contact@sign20.com →Not sure if your file works? Just send it — we review every file at no charge and tell you exactly what's usable before you commit to production.
Pre-Flight Checklist
Review before submitting — catching issues early saves time and money.
File Setup
- CMYK color mode
- Resolution for viewing distance
- Fonts outlined or embedded
- Linked images at correct res
- Ink coverage under 300%
Layout
- Bleed extends required distance
- Critical elements in safe zone
- Cut lines on dedicated layer
- Dimensions match ordered size
- Spell-check before outlining
Frequently Asked Questions
What file format is best for sign printing?
Vector formats like .AI and .EPS are preferred because they scale to any size without losing quality — from a business card to a full vehicle wrap. For photographic content, use high-resolution TIFF or PNG files at 150–300 DPI at final print size. If you're unsure which format fits your project, send what you have and we'll confirm before production.
What if I only have a low-quality logo?
We rebuild low-resolution logos as scalable vector artwork through a process called vectorization. The redrawn version works cleanly at any size, from business cards to building-scale wraps. Send whatever version you have — even a photo of a printed business card or an old JPG from a website — and we'll quote the rebuild as part of the project.
Can I use AI-generated images for my sign?
AI image generators output around 1024×1024 pixels, which is too small for most signage. A 4-foot-wide sign needs roughly 7,200 pixels across at 150 DPI to print cleanly. We can use AI-generated images as concept references and rebuild them as proper print-ready artwork at the correct resolution for your sign dimensions.
Can you design artwork for me?
Yes. Our in-house designers handle everything from simple layouts to full vehicle wraps and storefront sign packages. Larger projects typically include design at no cost with up to three revisions. Smaller one-off jobs are billed at $30/hour. Tell us what you're trying to accomplish and we'll recommend the right approach.
What resolution do I need for a large outdoor sign?
Resolution depends on viewing distance, not just sign size. A monument sign viewed from 20+ feet needs only 50–100 DPI at final size, while a close-up window decal needs 200–300 DPI. Always calculate resolution at the final print dimensions — an image that's 300 DPI at 4×6 inches becomes only 75 DPI when scaled to 16×24 inches.
How do I know if my file is good enough?
Send it — we review every file at no charge and tell you exactly what's usable before you commit to production. If anything needs to be rebuilt, vectorized, or upscaled, we'll quote that work up front. Upload here or email contact@sign20.com. Files under 25MB can go by email; larger files should use the upload portal.